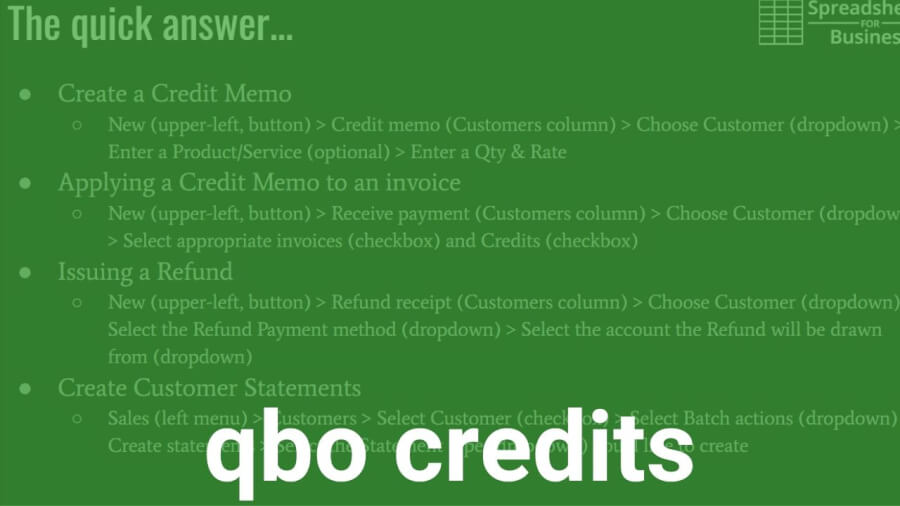
00:00 QuickBooks Online credit memos ensuring 00:02 accurate reporting okay so I let’s start 00:06 off your video off with a quick answer 00:08 so that somebody just needs to know 00:11 where to navigate to can get the 00:14 information they need the as you can see 00:17 there’s kind of a lot of aspects a lot 00:20 of quick answers to this video I will 00:21 start with the most fundamental which is 00:23 how to actually create a credit memo 00:24 okay and that’s easy enough that it is 00:28 done by going up to the new button and 00:30 under the customers heading you’re gonna 00:33 click on credit memo okay so once you 00:36 have a credit memo in there so you want 00:38 to apply that credit memo to an invoice 00:40 for a customer that’s new receipt 00:44 payment and enter the pertinent 00:56 information there back you out okay say 01:06 that you’re not able to do that ideal 01:09 thing where it makes more sense to issue 01:11 a refund rather than a credit memo you 01:14 can do that also in the new button and 01:17 hit refund receipt under the customers 01:21 column 01:34 and you’ll select the amount of the 01:36 refund there and fill out all the other 01:38 pertinent information about the customer 01:40 and then finally the customer request 01:43 statement or if you send out statements 01:45 as a matter of procedure then that’s 01:49 going to be a little different area 01:50 that’s gonna be the sales menu and 01:53 customers and you’re gonna select a 01:55 customer those sales customers okay you 02:01 just select the customer and batch 02:04 actions it’s a little tough to say and 02:07 create statements pick your statement 02:11 type your date range and send it the 02:15 customer okay so that’s it for the quick 02:19 answer now I’m gonna get into a little 02:22 more detail there’s a lot to cover here 02:25 so we’ll start plugging away okay so 02:32 first of all what our credit memos 02:35 excuse me 02:37 credit mine was the ability to credit a 02:38 customer for a particular dollar amount 02:41 next time that they receive an invoice 02:43 the credit will reduce the amount that 02:45 they owe it’s not a refund not the same 02:49 thing similar in nature but not the same 02:52 cash does not go back to the customer 02:55 which all things being equal is good you 02:58 don’t want cash leaving a business if 03:00 you can help it 03:01 it can be reflected on a customer 03:03 statement of course and should be and 03:06 will reduce the amount of accounts 03:10 receivable that you have once you’ve 03:12 created a credit memo okay so why use 03:14 them you know changing a transaction 03:19 like a past transaction can create 03:23 confusion you know if you’re tweaking 03:26 the amount that you sold it for or start 03:29 fidgeting around with you know standard 03:32 prices and and that sort of thing you 03:35 might not know the details of why you’re 03:38 doing what you’re doing so you know your 03:40 books could become out of balance if the 03:42 transaction was in a previous period too 03:44 so you know in simply discounting the 03:49 next transaction along the same lines 03:51 isn’t gonna tell the whole story you can 03:53 look back a year from now two years you 03:56 know you could send out a statement to 03:57 the customer they weren’t clear about 03:59 what happened and you don’t remember if 04:01 you deal with a lot of customers a lot 04:03 of transactions or somebody else in your 04:05 organization did it or you didn’t do a 04:08 credit memo but edit a transaction it 04:10 just can create confusion so you know a 04:13 credit memo accurately portrays the 04:15 events that took place okay it creates 04:17 what they call an audit trail it you 04:21 know allows you to look at it and 04:26 basically do what I out on this channel 04:30 is to make sure your accounting system 04:33 matches reality you know so it’s 04:37 beneficial in those terms and you know 04:43 really the the correct the best practice 04:46 so to speak when it comes to giving a 04:48 customer credit you know and a credit 04:51 memo is preferable to a cache where you 04:53 fund all things being equal sometimes 04:55 you’ll have to do a refund perhaps but 04:58 you know the reason for that is because 05:00 the old finance or basically what 05:03 corporate finance is built on a dollar 05:05 today is worth more than a dollar 05:06 tomorrow you want to keep that cash in 05:08 the organization so you can use it so 05:10 you can use it to pay employees so you 05:11 can use it to pay vendors okay so you 05:14 can reinvest it in your business and if 05:16 you send cash out to the customer 05:19 there’s no guarantee that they’re going 05:20 to return with that cash okay if if you 05:23 can get away with using a credit memo as 05:25 opposed to a refund then it incentivizes 05:27 them to come back their next purchase is 05:30 going to be less it’s going to have a 05:33 credit applied so you know it’s that’s a 05:37 couple of the reasons that a credit memo 05:39 is preferable to a cash refund with 05:43 QuickBooks Online it can be applied 05:45 automatically this is something you 05:47 specify in accounts and settings to 05:51 automatically when you create a credit 05:53 memo to apply to next invoice but yet 05:56 like I said you have to turn that 05:57 setting on 05:59 so we’ll get in a little more detail 06:02 rather than a quick answer rushing 06:04 through how to create a credit memo 06:09 again you’re gonna go to the upper left 06:14 do new button bit credit memo will 06:19 appear under customers credit memo and 06:25 then you’re gonna pick your customer 06:26 that’s going to receive the credit memo 06:32 will use won’t Duke’s basketball camp 06:36 again so you need to specify what the 06:45 credit memo was for if it’s you have to 06:50 use your judgment here if it’s in 06:52 regards to something being miss you know 06:59 something wrong on the invoice to the 07:01 customer or something an error involving 07:05 a particular product or service you can 07:06 select that particular product or 07:08 service and edit the quantity and/or 07:10 rate rate over to the right here or 07:15 potentially you could create a non 07:17 inventory product or service and 07:22 basically edit the description to say 07:25 this is a credit for you know the 07:31 customer was upset about the customer 07:33 service or something or whatever the 07:34 reason may be you know just so again so 07:37 you’ve got something a thorough 07:39 description there so you know when you 07:41 look at it years from now what you did 07:43 this for so maybe we miss billed if 07:50 that’s even a term build an error for a 07:56 rock fountain to Duke’s basketball camp 07:59 and we want to issue a credit memo for 08:03 $275 08:10 okay so we enter that information 08:14 product or service it is optional you 08:16 can just enter a quantity or rate also 08:19 and then you’re gonna hit save and new 08:23 if you want to do another you have a 08:25 couple credit memo standard Savin San to 08:27 email them the credit memo or just save 08:30 and close to exit in this case you can 08:33 preview it if you’re sending it to the 08:34 customer and you know actually let’s do 08:38 this let’s just delete this and let’s 08:44 just say we’re going to credit the 08:45 customer $275 they’re no product just we 08:49 messed up here’s our credit for $275 08:56 okay so that got sent to the customer 09:00 this is a sample company so didn’t 09:02 really send it to anybody but now it’s 09:05 in a system for Dukes basketball camp 09:08 okay so you expanse of all camp comes 09:11 back to us for more landscaping services 09:13 that’s our sample company that’s the 09:15 business they’re in and we’re gonna play 09:18 that credit to the next invoice so have 09:21 to have an existing invoice to credit of 09:23 course and it’s only necessary if 09:27 automatically applied credits like I 09:29 mentioned and account settings isn’t 09:31 selected and to do so you go to new the 09:35 upper left button receive payment and 09:44 hopefully there’s a default invoice in 09:46 here for Dukes basketball camp let’s see 09:56 doesn’t have an open invoice okay so I 10:00 picked the wrong customer there let’s go 10:03 with Geeta okay 10:06 so we’re gonna select we chose this 10:12 customer we’re gonna select the 10:13 appropriate invoice with a checkbox and 10:15 then there we go and then down below 10:24 here we would have a credit section that 10:30 we could apply to Gita’s let’s back out 10:36 of here and do it the right way 10:39 new credit memo and let’s apply it for a 10:51 friend eat it 10:57 let’s see I’m just doing them out here 11:03 over the 275 there okay now we have a 11:17 credit memo and forget it – now we will 11:25 go to new receive payment we know Geeta 11:30 has at $623 employees has standings 11:33 there I’m 11:45 is that and actually in this case they 11:51 are automatically applied 11:53 so you’ll notice the original amount 629 11:55 I misspoke but here’s the balance 11:58 at $275 doesn’t itemized it here but 12:02 you can see that it did apply it on the 12:06 next invoice if it’s not automatically 12:10 applied like I said it’ll appear down 12:11 here below where you can select the 12:12 credits that you want to apply to credit 12:14 memos to the invoices you’ve selected so 12:18 when we applied that save and send to 12:22 Geetha and hopefully it will show 12:26 applied on her PDF here no it doesn’t 12:36 that’s a little bit of a shortcoming a 12:37 little more detail would be good there 12:39 but what’s important is Geetha gutter 12:43 credit 12:44 okay so Geetha is a happy customer once 12:46 warm and you know we go back about our 12:50 business 12:52 so issuing a refund now let’s say Geetha 12:56 said no I’m never doing business with 12:57 you again I’m outraged you know it’s a 13:01 bad situation 13:02 I want to refund okay then to issue a 13:06 refund again to new we’re gonna go to 13:08 refund receipt this time the customers 13:10 column we’re gonna choose Geetha from 13:13 the drop-down customers refund receipt 13:28 choose geet okay and we want to choose a 13:38 refund payment method okay we’re gonna 13:41 do cash we’re gonna do credit back on 13:44 our credit card will do check for Geeta 13:52 and where it’s coming from want to 13:57 select that and we want to enter an 13:59 amount to that $75 and hopefully that’s 14:06 it for the refunds were issuing so we’ll 14:08 hit save and close and Geeta 14:14 there goes refund issued $275 okay now 14:22 it’s getting a little more detail about 14:25 statements statements provide 14:28 transparency to customers about their 14:30 account standing about the details of 14:32 credits refunds and that sort of thing 14:33 unfortunately the the receipt that we 14:37 issued early to get it didn’t I mean she 14:40 would probably know but it didn’t say 14:42 you know hey and you know and this is 14:44 just a preference of mine I want to know 14:46 here’s what it was you know the cost of 14:51 what I purchased from you here’s what 14:52 the amount it was this kind of buy is 14:55 and here’s the net amount that I would 14:57 owe and you know and I paid and here’s 15:00 my receipt detailing all that I didn’t 15:04 do that but the detail should be on the 15:06 statement so how to create a customer 15:11 statement it’s time again we don’t go to 15:14 new button we go to the sales menu with 15:18 select customers and we are already here 15:20 so sales customers that’s where we are 15:22 now okay then I’m gonna check box for 15:26 let’s look at eat as a count here for 15:29 the customer we want and you can do this 15:34 as in batch so you can do what have you 15:36 select here for all customers in this 15:37 case we’re just doing Geeta 15:38 she says send me stay Milan I’ll make 15:41 sure everything’s right about what you 15:43 did with my account okay eat him happy 15:46 to do that and we select that batch out 15:52 actions drop-down and create statements 15:55 okay so we want to select the statement 15:58 type that we’d like to create we’ll get 16:00 into that in a little more detail here 16:03 in just second we want whichever is most 16:05 appropriate for the situation with the 16:07 date range we’ll give her for the past 16:09 month here and yeah so let’s talk about 16:14 statement types real quick before we do 16:16 that 16:16 okay balance for word is gonna give a 16:18 list of payments and invoices that the 16:20 customer had it clarifies what is 16:22 currently do on the account open items 16:26 okay this is gonna be open invoices 16:28 detail and unpaid invoices credit memos 16:31 and unapplied payments this would have 16:33 been the type of statement we would have 16:35 santaguida before we did the settled the 16:42 invoice earlier well actually that one 16:48 might I guess since we just sent the 16:50 invoice then one might be appropriate 16:51 trans actually same it’s gonna be 16:52 transaction detail of a date range it’s 16:54 appropriate for accounts with a high 16:55 volume of transaction so let’s try this 16:56 open item here and apply it now nothing 17:08 trade balance forward then 17:20 all right because Gita’s balance is zero 17:23 now so let’s do save and send this is 17:29 what’s nice about QuickBooks Online it 17:30 gives you the opportunity to preview it 17:32 yeah this is what we want okay so not a 17:35 high volume in transactions but 17:37 specifies what we did on the account you 17:42 know we issued an invoice on 12:12 for 17:45 six hundred twenty nine ten dollars 17:47 there’s our credit memo we entered 17:49 earlier for 275 there’s a refund 17:52 we gave her for 275 obviously in the 17:54 real world you probably wouldn’t do both 17:56 but you know Gaeta was our best example 17:59 so now Gaeta owes us seventy nine ten 18:04 we’ll send that to her and there you go 18:10 okay 18:12 so have you previously created 18:13 statements and like I said there’s a lot 18:16 of detail on this one but we’re almost 18:18 through it sales on the Left menu with 18:22 all sales sales all sales we’ll just 18:26 click it here takes us to the same spot 18:32 from there we’re gonna select the filter 18:35 drop down and type statements so we want 18:41 to filter and type so drop down drop 18:45 down statements okay for the last year 18:52 well let’s apply that should show Geetha 18:54 is I think yes there it is so now we can 18:58 see it again if she calls in with a 18:59 question about her statement you know 19:02 again this isn’t all gonna happen just 19:05 boom boom boom like we’re doing it now 19:06 you know time will pass people forget 19:09 stuff you know you got a lot on your 19:11 plate as a small business owner so you 19:15 know this is how we can see again 19:17 Geeta’s a statement and she wants to 19:20 call him and speak on it then we’ll have 19:22 it in front of us and we can help her 19:24 piece together what happened so 19:29 that’s the view previously created 19:31 statements now to automatically apply 19:34 credits which is what was set up in this 19:39 particular sample account but just to 19:42 let you know how that happened 19:43 I’m gonna go to the gear in the upper 19:45 right accounts and settings under the 19:48 your company heading your company 19:54 accounts and settings then on the Left 19:57 menu we’re gonna go to advanced and 19:58 we’re going to edit and edit click the 20:01 little pencil any automation section 20:07 waiting on it here ok let’s try again 20:14 counts and settings let’s do advanced 20:21 and like I said down here in the scroll 20:26 post-it no advanced ok in in the 20:40 automation section edit and that’s check 20:47 box you’re looking for automatically 20:49 applying credits is on off set of how 20:53 you want it probably on and then you 21:01 want to click Save now will 21:03 automatically applying credits then 21:06 click done to get out of the accounts 21:08 and settings okay so that covers 21:13 everything to do with credit memos so a 21:19 lot of information there but covered 21:21 credit memos refunds statements you know 21:26 so everything kind of potentially 21:29 affected by a credit memo so there’s a 21:31 lot to you know there QuickBooks Online 21:35 is pretty simple but there’s a lot of 21:37 different a lot of things you can do you 21:40 know because business is dynamic and 21:41 you know that you know so if bookkeeping 21:46 isn’t your cup of tea if you know having 21:49 to research and how to do this stuff 21:51 every time you need to do something new 21:52 there’s a new cup of tea if you’d rather 21:54 spend your time working on your business 21:56 helping it grow and less time on menial 21:59 tasks like watching spreadsheets for 22:01 business quickbooks online videos 22:03 nothing personal I get it and you know 22:07 you just want to do more business and 22:09 less data entry okay then check out bot 22:11 keeper I’ll have a link down in the 22:12 description and what bot keeper does is 22:15 automate but keeping tasks that you hate 22:17 to do all right so it’s a artificial 22:21 intelligence powered and that’s what 22:24 does the bulk of the work and then it 22:27 also has a human touch that kind of 22:29 qualifies the artificial intelligence 22:32 transactions and you know just puts a 22:35 set of human eyes on it to to make sure 22:37 everything’s accurate timely and you 22:41 know most importantly off your back so 22:42 if it’s something you think you’d be 22:44 interested in again click that link down 22:46 in the description and check it out so 22:48 this was a long video I’ll wrap it up 22:51 here thank you for liking and 22:53 subscribing and why would you like well 22:56 if you liked the fact that I got gave it 22:59 a quick answer up front was shortened to 23:00 the point but then went into more detail 23:02 after that if you’d like that format I 23:03 would appreciate a like if you find 23:05 yourself if you’re gonna do your own 23:07 bookkeeping and you find yourself 23:08 looking up how to videos and QuickBooks 23:11 Online fairly often then consider 23:14 subscribing so you can just jump onto my 23:17 channel and see if I’ve covered it and 23:19 in that case great then if not you can 23:22 search search it on the YouTube you know 23:27 through the youtube search so hey I’m 23:30 appreciate you guys watching as always 23:32 take care
How Do Purchase Orders Work in QuickBooks Online? Video summary
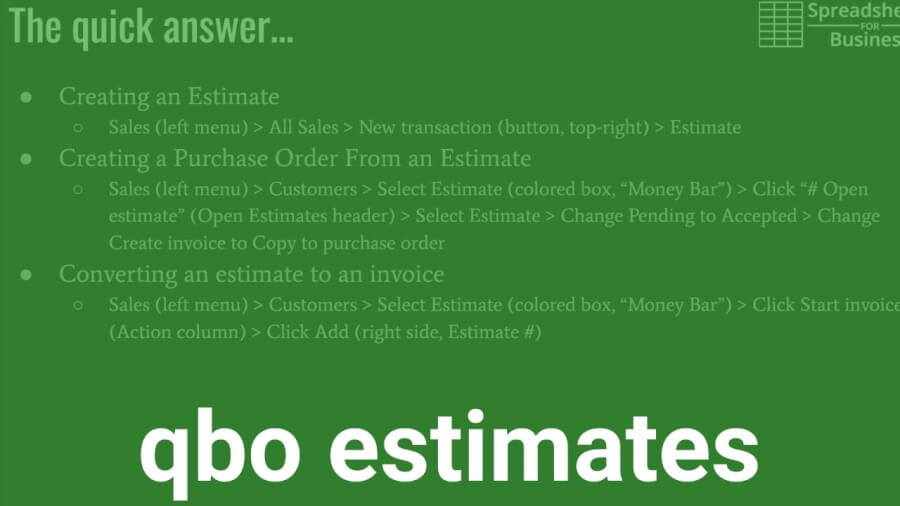
Here’s how to create an estimate in QBO:
Click Sales (left menu), then All Sales
Next, New transaction (button, top-right), then Estimate
Here’s how to create a purchase order from an estimate:
Click Sales (left menu), then Customers
Next, select Estimate (colored box, “Money Bar”)
Then, click “# Open estimate” (Open Estimates header) and select Estimate
Change from Pending to Accepted
Finally, change Create invoice to Copy to purchase order
Here’s how to convert an estimate to an invoice in QBO:
Click Sales (left menu), then Customers
Next, select Estimate (colored box, “Money Bar”) and then click Start invoice (Action column)
Finally, click Add (right side, Estimate #)
What are estimates in QuickBooks Online?
An estimate is an offer to a customer. It’s an official assessment of how much, you think, a set of products and/or services will cost them.
Technically speaking, it is a non-posting transaction. No GL entry is made in QuickBooks Online when an estimate is created.
Estimates are sometimes required by larger customers or government entities.
Though the estimate won’t result in a GL entry directly, the information from the estimate can be transferred to purchase orders (for products/services needed to complete the bid). Or, it can be transferred to invoices (to bill for the work specified in the estimate).
In both cases, you are saved the hassle of having to re-enter information.
Creating an estimate in QBO
Start by clicking Sales (in the left menu). Next, choose All Sales and New transaction (dropdown, top-right). Then, click Estimate.
Select the appropriate customer (from the dropdown). Enter the Estimate date & Expiration date.
Choose the appropriate Products/Services (dropdown). Edit the Rate and/or Amount if necessary.
When done, click Save and send (button, lower-right). Preview the Estimate and if everything looks okay, click Send and close (button).
Creating a PO from an estimate in QuickBooks Online
Start by clicking Sales (in the left menu) and choose Customers.
Select Estimate (colored box, “Money Bar”) and click “# Open estimate” (Open Estimates header).
Next, you’ll click on appropriate Estimate and choose Pending (in the upper-left, dropdown). Change it to Accepted.
Click Create invoice (upper-right, dropdown). Now, change to Copy to purchase order. Select OK (button).
Almost there…
Select Vendor (from the dropdown). Then the appropriate Product/Service (Item details, dropdown). Finally, click Save and send (button) to preview the Purchase Order. If all is okay, click Send and close.
Converting an estimate to an invoice in QBO
As usual, start by clicking Sales (in the left menu) and choose Customers.
Update the Invoice date & Due date. Click Add (right side, Estimate #). Then, enter the details for the amount to invoice. When finished, click Save and close (button).
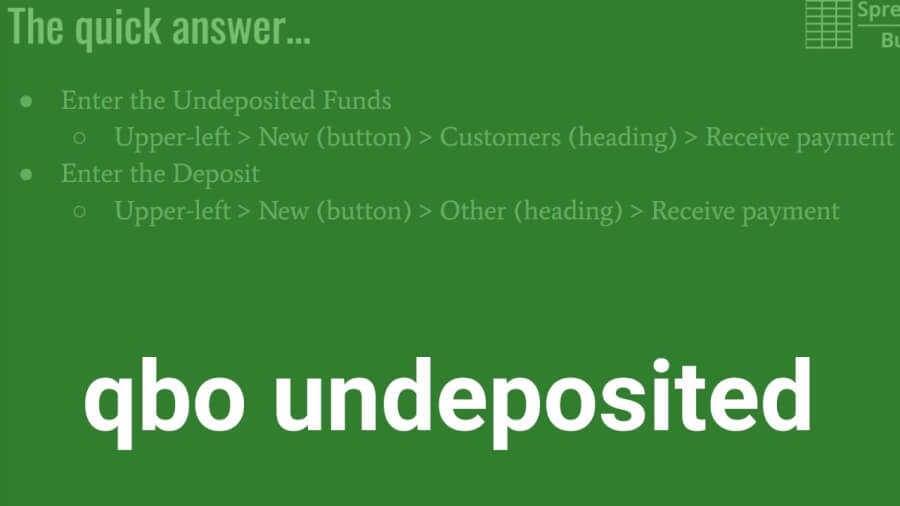
00:00 QuickBooks Online and deposited funds 00:01 the best practice for handling them 00:06 quick answer is to enter the undeposited 00:10 funds and then enter the deposit so 00:15 undeposited funds are entered the upper 00:18 left the new button under customers and 00:23 receive payment and enter the pertinent 00:31 information there and choose your 00:32 invoices and after that when you 00:37 actually make the deposit in the bank 00:38 you also come up to the new button under 00:42 other bank deposit you’ll enter the 00:46 pertinent information up top and then 00:49 you’ll check your undeposited funds and 00:52 that you’re going to deposit okay so I’d 01:00 like to start every video on with a 01:01 quick answer like that and then after I 01:03 get into a little detail so what are 01:07 undeposited funds for starters 01:09 these are receive checks there may be 01:12 cash that aren’t yet deposited into the 01:17 bank so you want to record them as a 01:19 sale you want to send a customer a 01:23 receipt you want to acknowledge that an 01:26 invoice is no longer outstanding and the 01:30 reason you want to do that is because 01:32 you know it’s kind of a thing I’ve 01:36 always preached that you want your 01:37 software your accounting software to 01:41 match reality you want it to reflect 01:43 reality because that’s its job is to 01:46 reflect the reality of your business so 01:48 that’s why you acknowledge that this 01:51 cash has been received but you know 01:54 again the reality is also that it is not 01:56 yet been entered into or deposited into 01:59 your bank account so it allows you also 02:05 when you when you make a deposit you 02:07 know probably a lot of businesses are 02:09 going to batch a lot of checks together 02:11 you know 02:12 from client one client to client three 02:14 and client for you know for $100 each 02:17 let’s say for a $400 deposit will your 02:20 bank statements gonna reflect a 400 02:22 dollar deposit you know if you didn’t 02:25 enter these undeposited funds 02:28 individually you know the the for $100 02:32 payments you received then you know 02:37 you’d have a tough time matching it to 02:41 your bank statement okay your bank 02:43 statements gonna say 400 you’re gonna 02:45 have for $100 payment receipts so he 02:50 said this way 02:51 QuickBooks knows it was these four 02:53 payments that comprised that $400 02:57 deposit hope that makes sense we’ll get 03:01 into a little more detail here okay so 03:04 back to entering undeposited funds as I 03:08 mentioned in the upper left there’s the 03:10 new button the customers heading in the 03:12 received payment okay let’s go back to 03:15 that screen all right so the first thing 03:23 you’re gonna do is enter the customer 03:25 who made the payment of course and we’ll 03:28 just pick someone at random from this 03:30 list who hopefully I was outstanding 03:32 invoice they do so I picked Red Rock 03:36 diner and then the date the payment was 03:39 made okay that’s gonna be reflected on 03:42 the receipt and they you know again you 03:43 want that they made payment yesterday 03:46 but you didn’t get a chance to enter it 03:47 into QuickBooks until today you want to 03:49 change that to yesterday’s payment 03:51 payment date you can honor the payment 03:55 method cash check or credit I’m not sure 04:03 when credit would apply there might be 04:07 circumstances since I have it as an 04:08 option but typically I would say it’s 04:11 going to be cash or cheque and then a 04:14 reference number this could be your 04:16 customers cheque number or some other 04:18 unique identifier so if need be if there 04:21 was a problem or you needed to do 04:23 some digging around on something you 04:25 could have a valid reference number like 04:32 I said you can put a check number in 04:33 there and you want to put it in 04:36 undeposited funds is you I guess right 04:41 that’s probably why credits in here 04:43 because this is receive payment it’s you 04:45 know this is what specifies that it goes 04:47 to undeposited funds so you could 04:49 obviously receive a credit payment and 04:52 you know but not probably wouldn’t put a 04:56 ton to positive funds so and after you 05:01 enter that information up there like I 05:06 said put it under positive funds go the 05:07 next slide here if it’s in response to 05:11 an invoice then you’re gonna match click 05:14 the checkbox next to the appropriate 05:15 invoice and that is it so let’s say that 05:19 our customer Red Rock diner paid on this 05:25 hundred fifty six dollar invoice and 05:27 that’s gonna reflect down here the 70 05:31 dollar invoice is still outstanding 05:32 you can click either save and new to 05:36 enter a new undeposited funds for a new 05:39 client or if that’s your last one save 05:43 and send we’ll send a customer a receipt 05:45 so even close will do exactly what it 05:48 says and close it take you back to the 05:52 dashboard there okay so you know you’ve 06:00 entered all of your undeposited funds 06:04 and now you’ve come back from the bank 06:11 where you actually made the deposit into 06:13 your checking account so we’re savings 06:17 you want to enter that into QuickBooks 06:19 so that is also a bit new and it’s under 06:23 other bank deposit 06:31 and let’s see what do we do we just did 06:35 Red Rock diner tastes assy 06:38 well first you want to select your 06:41 account that you’re going to put it in 06:43 which most times would be checking I 06:46 imagine perhaps savings the date you 06:49 made the deposit again if you made a 06:51 deposit this also helps with if you made 06:53 it yesterday 06:55 if you made it yesterday make sure you 06:57 pay yesterday because this will also 06:59 help with you know reconciling your 07:02 checking account again you want your 07:04 accounting software to match reality so 07:08 select the accountant a date we hit the 07:12 check box next to the appropriate 07:13 undeposited funds that we deposited and 07:17 it’s a similar sort of thing you can see 07:21 Red Rock diner the date all the 07:23 information we entered previously you 07:27 have a chance to edit it here 07:29 and I can do save a new to enter another 07:33 bank deposit or save and close’ will do 07:37 save and close the show we deposited at 07:39 one hundred fifty six dollars and there 07:41 we go our transactions and QuickBooks 07:44 Online match what actually happened in 07:47 reality so that’s it it’s a pretty 07:54 straightforward sort of thing the 07:55 intuitive to enter and as long as you 07:58 understand why it’s important to enter 08:00 undeposited funds and you know the 08:04 detail and again have that information 08:06 in your accounting software match 08:08 reality you know when saying with the 08:12 deposit then yeah it was really good 08:15 like I said it’s a pretty simple thing 08:16 to do so anyhow if you know that’s 08:21 simple some other bookkeeping tasks 08:23 aren’t as simple and bookkeeping isn’t 08:25 everybody’s cup of tea particularly if 08:27 you’re a small business owner you know 08:29 your your expertise is in your craft you 08:33 know whatever whatever you’re selling 08:35 and you know bookkeeping might be a 08:39 chore for you so if that’s the case you 08:42 check out ba keeper there’s 08:44 link down in the description and what ba 08:47 keeper is basically a bookkeeping 08:50 service that utilizes artificial 08:54 intelligence to handle the bulk of the 08:58 workload and then also implements a 09:00 human element to kind of qualify things 09:03 to you know to double check to make sure 09:06 everything’s going alright so what you 09:08 know what it does though allows you to 09:11 work more on your business and less on 09:13 data entry and you know spend more time 09:17 pumping to grow so if you find in 09:20 bookkeeping to be a chore definitely 09:23 click on that link and just check it out 09:26 and see if it’s something that might 09:29 help and make your life easier so that’s 09:33 it for this video you like you know it 09:37 is format with every quickbooks online 09:41 every video that i post you know or have 09:45 been posting recently is start out with 09:47 the quick answer so you can get the 09:50 information you need right off the bat 09:51 and then doing a little more detail on 09:53 the subject matter if you like that 09:54 format being short to the point up front 09:57 and detailed and do the rest of the 10:00 video you could show that that you like 10:05 that by giving the video a like and you 10:07 find yourself searching for quickbooks 10:09 online how to videos fairly often or you 10:11 think you might search in the future you 10:13 can subscribe and then you’ll know to 10:14 check spreadsheets for business first to 10:18 see if i covered the subject and that 10:21 mean quick and easy for you so so I got 10:24 appreciate you guys watching 10:26 take care