QuickBooks Online (QBO) Deposit Tutorial | Non-Sale Transactions [VIDEO]

qbo nonsale deposit tutorial thumbnail

common excel questions
COPY COUPON CODE HERE: DFE25KLPMN768ZB5

Entering a non-sale deposit into QuickBooks Online video summary

The simple explanation is:

Click on New (button, upper-left). Then Bank deposit (Other column).

A more detailed walkthrough is outlined below.

Deposit transactions

Undeposited funds from sales are not the only deposits that need to be made.

For a tutorial on undeposited sales, see the “Best Practice for Undeposited Funds in QuickBooks Online” video and post.

What are some examples of undeposited funds that aren’t from sales?

There are loan proceeds, cash from the owner(s), and refunds from vendors, for example.

There are also reimbursements (from employees) and tax refunds.

As you can see, not all deposits are subject to tax, and not all need to be matched with sales receipts/invoices.

Every transaction should be properly categorized, though.

How to enter a deposit transaction

  1. Click New (button, upper-left) and then Bank deposit (Other column)
  2. Select the Account (checking/savings/etc) for the Deposit to go into
  3. Enter the Date of the deposit
  4. Enter who the deposit was Received From (dropdown)
  5. Enter an Account (GL) (dropdown) for deposit to be recorded against
  6. Enter a Description for the deposit
  7. Enter a Payment Method (dropdown)
  8. Enter a Ref No. (e.g. check number)
  9. Click Save and new (button/dropdown)
    1. If you need to enter another deposit
      1. Save and close if you are finished
how to enter a qbo deposit transaction screenshot
Click to enlarge
Credit: qbo.intuit.com

Best Practice for Undeposited Funds in QuickBooks Online [VIDEO]

qbo undeposited funds video featured

Video slides

Video transcript

00:00 QuickBooks Online and deposited funds
00:01 the best practice for handling them
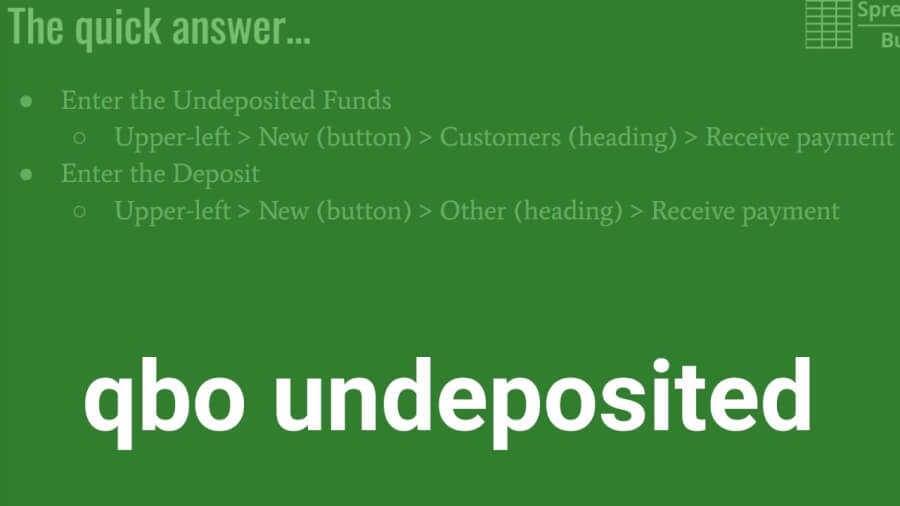
00:06 quick answer is to enter the undeposited
00:10 funds and then enter the deposit so
00:15 undeposited funds are entered the upper
00:18 left the new button under customers and
00:23 receive payment and enter the pertinent
00:31 information there and choose your
00:32 invoices and after that when you
00:37 actually make the deposit in the bank
00:38 you also come up to the new button under
00:42 other bank deposit you’ll enter the
00:46 pertinent information up top and then
00:49 you’ll check your undeposited funds and
00:52 that you’re going to deposit okay so I’d
01:00 like to start every video on with a
01:01 quick answer like that and then after I
01:03 get into a little detail so what are
01:07 undeposited funds for starters
01:09 these are receive checks there may be
01:12 cash that aren’t yet deposited into the
01:17 bank so you want to record them as a
01:19 sale you want to send a customer a
01:23 receipt you want to acknowledge that an
01:26 invoice is no longer outstanding and the
01:30 reason you want to do that is because
01:32 you know it’s kind of a thing I’ve
01:36 always preached that you want your
01:37 software your accounting software to
01:41 match reality you want it to reflect
01:43 reality because that’s its job is to
01:46 reflect the reality of your business so
01:48 that’s why you acknowledge that this
01:51 cash has been received but you know
01:54 again the reality is also that it is not
01:56 yet been entered into or deposited into
01:59 your bank account so it allows you also
02:05 when you when you make a deposit you
02:07 know probably a lot of businesses are
02:09 going to batch a lot of checks together
02:11 you know
02:12 from client one client to client three
02:14 and client for you know for $100 each
02:17 let’s say for a $400 deposit will your
02:20 bank statements gonna reflect a 400
02:22 dollar deposit you know if you didn’t
02:25 enter these undeposited funds
02:28 individually you know the the for $100
02:32 payments you received then you know
02:37 you’d have a tough time matching it to
02:41 your bank statement okay your bank
02:43 statements gonna say 400 you’re gonna
02:45 have for $100 payment receipts so he
02:50 said this way
02:51 QuickBooks knows it was these four
02:53 payments that comprised that $400
02:57 deposit hope that makes sense we’ll get
03:01 into a little more detail here okay so
03:04 back to entering undeposited funds as I
03:08 mentioned in the upper left there’s the
03:10 new button the customers heading in the
03:12 received payment okay let’s go back to
03:15 that screen all right so the first thing
03:23 you’re gonna do is enter the customer
03:25 who made the payment of course and we’ll
03:28 just pick someone at random from this
03:30 list who hopefully I was outstanding
03:32 invoice they do so I picked Red Rock
03:36 diner and then the date the payment was
03:39 made okay that’s gonna be reflected on
03:42 the receipt and they you know again you
03:43 want that they made payment yesterday
03:46 but you didn’t get a chance to enter it
03:47 into QuickBooks until today you want to
03:49 change that to yesterday’s payment
03:51 payment date you can honor the payment
03:55 method cash check or credit I’m not sure
04:03 when credit would apply there might be
04:07 circumstances since I have it as an
04:08 option but typically I would say it’s
04:11 going to be cash or cheque and then a
04:14 reference number this could be your
04:16 customers cheque number or some other
04:18 unique identifier so if need be if there
04:21 was a problem or you needed to do
04:23 some digging around on something you
04:25 could have a valid reference number like
04:32 I said you can put a check number in
04:33 there and you want to put it in
04:36 undeposited funds is you I guess right
04:41 that’s probably why credits in here
04:43 because this is receive payment it’s you
04:45 know this is what specifies that it goes
04:47 to undeposited funds so you could
04:49 obviously receive a credit payment and
04:52 you know but not probably wouldn’t put a
04:56 ton to positive funds so and after you
05:01 enter that information up there like I
05:06 said put it under positive funds go the
05:07 next slide here if it’s in response to
05:11 an invoice then you’re gonna match click
05:14 the checkbox next to the appropriate
05:15 invoice and that is it so let’s say that
05:19 our customer Red Rock diner paid on this
05:25 hundred fifty six dollar invoice and
05:27 that’s gonna reflect down here the 70
05:31 dollar invoice is still outstanding
05:32 you can click either save and new to
05:36 enter a new undeposited funds for a new
05:39 client or if that’s your last one save
05:43 and send we’ll send a customer a receipt
05:45 so even close will do exactly what it
05:48 says and close it take you back to the
05:52 dashboard there okay so you know you’ve
06:00 entered all of your undeposited funds
06:04 and now you’ve come back from the bank
06:11 where you actually made the deposit into
06:13 your checking account so we’re savings
06:17 you want to enter that into QuickBooks
06:19 so that is also a bit new and it’s under
06:23 other bank deposit
06:31 and let’s see what do we do we just did
06:35 Red Rock diner tastes assy
06:38 well first you want to select your
06:41 account that you’re going to put it in
06:43 which most times would be checking I
06:46 imagine perhaps savings the date you
06:49 made the deposit again if you made a
06:51 deposit this also helps with if you made
06:53 it yesterday
06:55 if you made it yesterday make sure you
06:57 pay yesterday because this will also
06:59 help with you know reconciling your
07:02 checking account again you want your
07:04 accounting software to match reality so
07:08 select the accountant a date we hit the
07:12 check box next to the appropriate
07:13 undeposited funds that we deposited and
07:17 it’s a similar sort of thing you can see
07:21 Red Rock diner the date all the
07:23 information we entered previously you
07:27 have a chance to edit it here
07:29 and I can do save a new to enter another
07:33 bank deposit or save and close’ will do
07:37 save and close the show we deposited at
07:39 one hundred fifty six dollars and there
07:41 we go our transactions and QuickBooks
07:44 Online match what actually happened in
07:47 reality so that’s it it’s a pretty
07:54 straightforward sort of thing the
07:55 intuitive to enter and as long as you
07:58 understand why it’s important to enter
08:00 undeposited funds and you know the
08:04 detail and again have that information
08:06 in your accounting software match
08:08 reality you know when saying with the
08:12 deposit then yeah it was really good
08:15 like I said it’s a pretty simple thing
08:16 to do so anyhow if you know that’s
08:21 simple some other bookkeeping tasks
08:23 aren’t as simple and bookkeeping isn’t
08:25 everybody’s cup of tea particularly if
08:27 you’re a small business owner you know
08:29 your your expertise is in your craft you
08:33 know whatever whatever you’re selling
08:35 and you know bookkeeping might be a
08:39 chore for you so if that’s the case you
08:42 check out ba keeper there’s
08:44 link down in the description and what ba
08:47 keeper is basically a bookkeeping
08:50 service that utilizes artificial
08:54 intelligence to handle the bulk of the
08:58 workload and then also implements a
09:00 human element to kind of qualify things
09:03 to you know to double check to make sure
09:06 everything’s going alright so what you
09:08 know what it does though allows you to
09:11 work more on your business and less on
09:13 data entry and you know spend more time
09:17 pumping to grow so if you find in
09:20 bookkeeping to be a chore definitely
09:23 click on that link and just check it out
09:26 and see if it’s something that might
09:29 help and make your life easier so that’s
09:33 it for this video you like you know it
09:37 is format with every quickbooks online
09:41 every video that i post you know or have
09:45 been posting recently is start out with
09:47 the quick answer so you can get the
09:50 information you need right off the bat
09:51 and then doing a little more detail on
09:53 the subject matter if you like that
09:54 format being short to the point up front
09:57 and detailed and do the rest of the
10:00 video you could show that that you like
10:05 that by giving the video a like and you
10:07 find yourself searching for quickbooks
10:09 online how to videos fairly often or you
10:11 think you might search in the future you
10:13 can subscribe and then you’ll know to
10:14 check spreadsheets for business first to
10:18 see if i covered the subject and that
10:21 mean quick and easy for you so so I got
10:24 appreciate you guys watching
10:26 take care

Apply For & Connect Existing QuickBooks Online Payments Accounts [VIDEO]


Where and how to sign up for QuickBooks Payments in QBO video summary

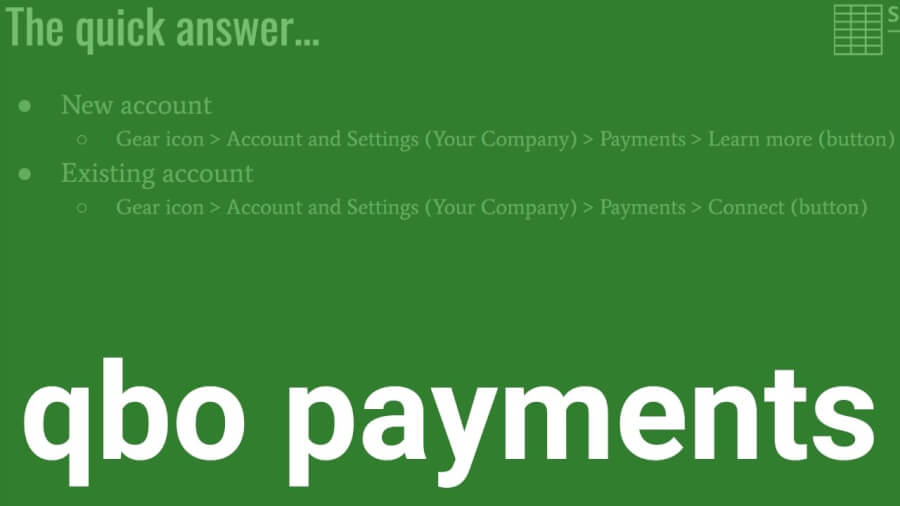
For a new account:

  1. Gear icon
  2. Account and Settings (Your Company)
  3. Payments
  4. Learn more (button)

For an existing account

  1. Gear icon
  2. Account and Settings (Your Company)
  3. Payments
  4. Connect (button)

What does QBO Payments do?

QBO Payments allows your small business to accept payment by:

  • Credit card
  • Apple Pay
  • Bank transfer

There is a “small” fee per transaction for all of the above.

If your customer has prior authorization, they can pay online invoices with “Pay Now” button. They can also pay over the phone. Either option will get you paid quicker.

Customers have the option of entering their credit card information too. All transactions are automatically entered into QBO.

Applying for a QBO Payments account

  1. Gear icon > Account and Settings
  2. Left menu > Payments
  3. Learn more (button)
  4. Set up payments (button)

Section 1 of the application will ask for information about your business Some information will already be populated. So, enter any additional information that is needed and double-check what was auto-filled Click “Next.”

Section 2 of the application asks for owner information. Complete what is needed here.

Section 3 of the application asks for bank information Just search for your bank. When you find your bank, enter your account & routing number.

Connect existing QBO Payments account

If you have one of the following, you can connect it to QBO Payments:

  • GoPayment
  • QuickBooks Merchant Services
  • Intuit Merchant Services
  • Intuit Check Solution

Click on the gear icon and then Account and Settings.

Then, click on Payments on the left menu.

Finally, click the Connect button.

If you’re having trouble, click Help at the top of the screen and then Contact us. Support will call back and walk you through the process.

If you plan on processing over $7.5K per month be sure to ask for special pricing.

How To Set Up Bank Feeds in QuickBooks Online Step by Step [VIDEO]

qbo bank feed featured

Video transcript

00:01 getting bank transactions into
00:03 QuickBooks Online there are two basic
00:08 ways to do this and the first is to set
00:11 up a bank feed which is connecting your
00:14 bank with QuickBooks Online so that
00:17 transactions automatically come in and
00:21 you do that by going to banking on the
00:25 left hand menu the banking tab and then
00:28 Add Account you’ll search for your bank
00:33 or credit card here and once you find it
00:38 you follow the steps signing into your
00:41 with your bank information and do that
00:46 to could finish the connection and
00:49 that’ll bring in depending on your bank
00:53 anywhere from like 30 to 90 days maybe
00:57 more transactions the other way to do it
01:02 is to manually upload transactions and
01:05 that’s done by going to the same area
01:08 banking banking and then on the Update
01:12 button here the drop down menu click
01:15 that and do file upload so that’s a
01:21 quick answer we can get into a little
01:23 more detail here bank feeds are links
01:28 like I said between your bank and credit
01:30 card accounts and the transactions are
01:34 fed into QuickBooks Online Banking
01:36 Center and that makes it easier to match
01:41 transactions to reconcile your accounts
01:44 in essence between what happens at your
01:46 bank and what you have entered into
01:48 QuickBooks Online so to connect bank
01:53 feeds like I said left-hand menu
01:55 banking Center if this is your first
01:58 time if you haven’t connected any
02:01 accounts yet you’ll select a button that
02:03 says connect otherwise like in a sample
02:07 cup in here they’ve already connected
02:09 accounts so
02:11 in this case we click Add Account as I
02:14 mentioned and like I can’t afford that
02:17 lien you walk you through every single
02:19 step because of the nature of what we’re
02:24 doing here I can’t really connect the
02:26 bank account with this sample account
02:27 company and obviously making accounts a
02:31 little sensitive and not the sort of
02:33 thing you want to accidentally put
02:37 something out there that would you know
02:39 compromise like my bank account on
02:44 YouTube so I wish I could provide a
02:47 little more step-by-step detail but I’ve
02:50 tried to do as much as I can here so as
02:54 I mentioned when you click Add Account
02:57 you’ll select find your bank you’ll in
03:03 most cases you should be able to find
03:05 your bank and should be able to make a
03:06 connection it should be rare that you’re
03:09 not able to and once you enter your
03:13 login information for the bank or credit
03:15 card then you’re gonna choose the
03:17 appropriate account that you want to
03:21 link it to in quickbooks online choose
03:26 the appropriate account rather from your
03:27 bank or credit card and then you’re
03:30 going to choose the account and
03:32 quickbooks online to link it to you’re
03:34 gonna give the account a name and you’ll
03:37 click save’ and that’s how you set up
03:39 the bank feed so as i mentioned also you
03:45 know it depends how much history is
03:47 gonna be brought in from your bank or
03:49 credit card company could be as little
03:51 as 30 days could be up to around two
03:53 years obviously it’s zero days if your
03:57 bank or credit card won’t connect
03:59 quickbooks online so if you want more
04:02 history than that and particularly if
04:04 your bank or credit card won’t connect
04:06 what do you do you have to manually
04:09 upload transactions so when you do that
04:16 there a couple things to keep in mind
04:17 you’re gonna want to first settle on a
04:19 date range because you don’t want to
04:21 import upload transactions rather
04:24 that are already in QuickBooks Online
04:27 because then you’re gonna have duplicate
04:28 transactions so first thing you want to
04:32 do is go to chart of accounts and then
04:35 view register let’s back out of this and
04:41 do just that
04:42 that’s accounting and then chart of
04:43 accounts accounting in the left hand
04:46 menu and if you come down to try to
04:57 accounts you see your checking savings
04:59 whatever account it is you want to
05:01 import transactions into you come over
05:03 to the right hand side here the action
05:05 column and click on view register scroll
05:20 to the bottom of this information and
05:26 you can see the first date for that you
05:32 have the opening balance ok so typically
05:35 what you’re going to want to do is
05:36 upload transactions that occurred before
05:41 before that date of your opening balance
05:43 if you want more of a history in
05:46 QuickBooks Online and so now that you’ve
05:51 got an idea of the date range that you
05:52 need you’re gonna go to your bank or
05:55 credit card online log in and download
05:59 transactions that’s of course going to
06:01 be different for every bank or credit
06:05 card company out there though typically
06:09 the you know it’ll be roughly roughly
06:14 the same it shouldn’t be too hard to
06:15 find you want to make sure that the file
06:18 is in the correct format when you
06:19 download it and particularly so it’s in
06:22 the Clark correct format to upload into
06:26 quickbooks online preferred formats are
06:30 CSV click QBO that’s d preferred
06:36 format qfx and the file size can’t
06:40 exceed 350 kilobytes which shouldn’t be
06:44 a problem
06:45 that would be quite a bit of history
06:48 then you’re going to navigate to the
06:51 appropriate link as I mentioned that’s
06:54 back in banking and file upload or I’m
07:18 sorry I got a little ahead of myself
07:18 there you want to make sure you choose
07:22 the account that you want to upload to
07:26 so by clicking these like Co it’s got to
07:30 go back here now checking savings
07:34 account and that so you would select the
07:37 appropriate account first then you would
07:40 do file upload here’s a couple
07:50 screenshots from my bank you know to
07:54 kind of give you an idea of what you
07:55 might look for when you’re downloading
07:57 transactions from from your bank you
08:01 know in this case it’s under accounts on
08:05 a menu and there’s a specific place
08:07 they’re designated to download
08:09 transactions you know you pick the
08:12 account you want to download from you
08:14 select your date range and you select
08:16 your final type and then you’ll get
08:22 something like this that’ll you can view
08:25 in Excel and you know then it should be
08:30 ready to be uploaded so it’s beginning
08:36 upload you’re gonna come to
08:40 the screen that was that earlier and
08:44 again I can’t walk you through this
08:46 completely but you’re gonna get the
08:49 browse for the file to upload and in
08:58 this case yeah it won’t let me don’t
09:01 have a final it won’t let me do it but
09:03 you’ll select that file and it’ll walk
09:06 you through the steps they’re basically
09:11 two to getting that information uploaded
09:14 into quickbooks online so you select the
09:19 account that you want to upload to
09:21 double check that and you want to it’ll
09:27 match it’ll make sure everything’s
09:28 mapped correctly that it’s putting you
09:31 know credits into credit call and debits
09:32 in the debit column etc and you want to
09:38 match those columns make sure the same
09:41 and they’ll give you one last chance to
09:42 edit the information that you’re
09:44 uploading and then you’ll select let’s
09:46 go and so once you get those uploaded
09:49 into quickbooks online you’ll want to
09:52 categorize the transactions and that’s
09:57 basically will be down here in this
10:00 column and the savings isn’t a good
10:03 example look at the checking here see
10:09 some of them are uncharacterized income
10:13 you’ll want to make sure every single
10:15 one of those transactions is in the
10:19 correct category quickbooks online i
10:23 don’t know specifically what they mean
10:25 by this but they say until you do this
10:26 the transactions will not quote unquote
10:28 fully be in your account then once
10:32 everything is categorized you might want
10:36 to reconcile the transactions it’s not
10:39 completely necessary but QuickBooks
10:42 advises that you do that and you may
10:44 need to edit your opening balance if
10:46 you’re uploading transactions that took
10:48 place before the eyes update
10:53 so the simplest thing to do course is to
10:57 connect that bank feed but there might
11:01 be circumstances where you want more
11:03 information than can be provided in that
11:05 bank feed so you know you you’ll upload
11:10 transactions if you don’t have time to
11:14 do it yourself with bookkeeping isn’t
11:17 your thing
11:17 check out bot keeper I’ll have a link
11:20 down in the description of this video
11:22 and basically what ba keeper does is
11:26 mixes a I you know automation with a
11:31 human element to do your bookkeeping for
11:33 you and allows you to work more on your
11:36 business particularly work more on sales
11:39 and then bookkeeping itself and as I
11:43 mentioned there’s a link to that down in
11:44 description so that’s all I got for
11:47 getting bank transactions into
11:50 QuickBooks Online if you thought this
11:53 video was you know like a quick answer
11:56 to shorten to the point answer but also
11:58 the detail that I went into and that let
12:02 me know by giving me a like please and
12:05 if you have another they find yourself
12:08 looking up information about QuickBooks
12:10 Online frequently and I think you might
12:13 need to find out find more how-to videos
12:16 in the future or subscribe